 I’ve built three pole barns in my life and every one I have said would be my last. This time I mean it – the barn I have built here at Timber Butte this last year I am quite sure is my last. Pole barns are a lot of work. They require a thousand trips up and down the full extension of a twenty foot ladder and in my case, in every kind of weather imaginable. This last barn took me a full year of working every free day I had off.
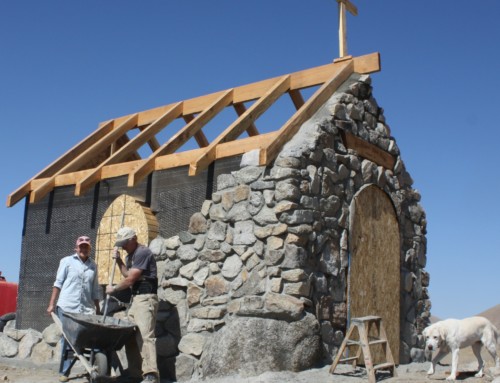
We designed our new barn not only from our previous barn building experience, but also after examining the construction of a dozen old barns that have stood the test of time. Because this Timber Butte country is so exposed it is subject to harsh weather conditions. It’s not uncommon for us to encounter micro bursts of wind up to eighty miles an hour when storm fronts are moving through the area, especially in late spring and early summer. We have witnessed conventional metal barns being completely destroyed in these high winds. This is all at great expense to the owner and because of it we have to take weather into serious consideration when constructing outbuildings. A pole structure is superior to other large structures because the heavy treated poles are set deep into the earth and encased in concrete making them less vulnerable to high winds and harsh weather conditions.
The first and most crucial part of barn construction is the layout and setting of the poles themselves. They must be perfectly spaced, perfectly square and perfectly level due to the fact that they serve as the building support for the remainder of the structural walls. The poles will determine how plumb and true the exterior walls will be. After the poles are set a foundation trench is dug from pole to pole, level strings are strung and forms are put into place. I built my foundation out of concrete block laid in beds of cement between the poles. The cores were filled and foundation bolts were set to anchor the bottom plates of interior and exterior walls. When this basic infrastructure was in place my son-in-law used pole climbers to scale the main poles and lop off the tops at 18 feet. The smaller 4×4 posts that are used to anchor and support the two side wings of the barn were cut off at an even height of 8 feet.
Framing an 18 foot wall on my own was challenging to say the least; but with care and a lot of trips up the extension ladder it can be done, one long stud at a time. After this basic structure is in place the remainder of the barn is framed the same as any other stick framed building.
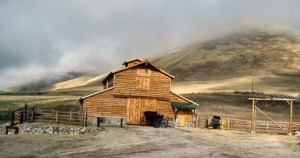
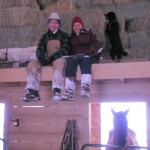
Siding was a great challenge as well mainly due to the potential expense of having to purchase and cover such a large area. An issue for us was that we wanted our barn to look like it belonged on an old ranch. My personal preference was that it wouldn’t be sided with common manufactured siding. My previous barns had been sided with 1×12 bat and board siding which had been locally milled here in our community. A structure this size can be shopquite costly using materials that can be up to a dollar a lineal foot not to mention the ongoing staining that is required to protect it from the penetrating sun and damaging elements. I actually considered purchasing a band saw mill to produce our own siding from local timber until a good friend told me about pallets of rejected log siding that a local manufacturer was going to cut up and sell for fire wood. Due to that blessing we were able to side the entire barn with half logs for less than $600. Placing logs (some were ten feet long) up the sides of a 20 foot wall on my own was a long, hard, tedious job. For my 60th birthday all of our kids and my parents showed up on a snowy January day to give me a hand which was a wonderful present. The logs were bowed, weathered and rustic, but that’s actually what we wanted. After one year the barn already looks like it had been sitting there forever.
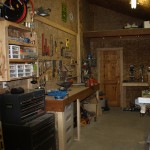
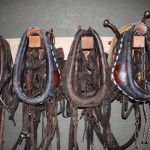
Our barn is 40×40 overall. It has four inside stalls with mangers for the animals, a 10×10 tack room, a feed room, a small bunkroom, and a 10×30 workshop. It also has a 20×30 central room with a hayloft above that holds four to six tons of hay. It is perfect for a small operation like ours. For the first time in my life, this barn has provided me with an enclosed area where I can saddle or shoe our horses even in the dead of winter. It has been a long hard process, but after all of the years that I have had to feed animals morning and night in the wind, snow and mud – this barn is a luxury and a blessing that I will never take for granted.

The first step is to set the poles.
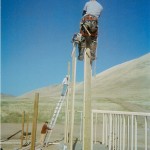
My son in law cut off the tops.

Leave A Comment
You must be logged in to post a comment.